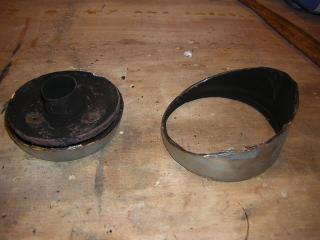
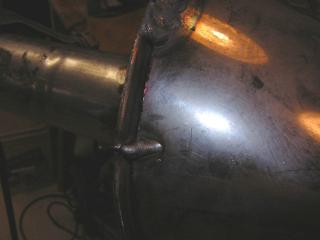
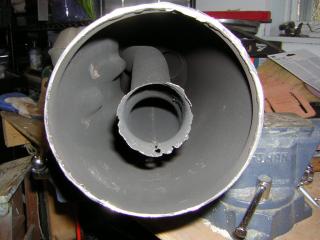
This is the inside of a BMW muffler. The pipe in the center is the outlet, which has rusted through, making the motorcycle loud. There's no packing inside, just a baffle.
The inner components are normal steel, not stainless. At the very end of the outlet pipe, the pipe rusted through, and my muffler got quite loud. This muffler has been on the bike nearly 10 years, and I think the bike was stored outside some of that time.
This was a difficult and time consuming repair. I probably would not recommend this repair. I hope this page is interesting to anyone wondering what is inside a somewhat older BMW motorcycle muffler. I don't know how much I've extended the life of the muffler. A new muffler is close to $1000, and that's a lot of money to me. If the muffler were more affordable, I would never have done this repair.
The metal cutting and welding makes a big mess in the garage. My end result is solid, but not very pretty. The muffler is much quieter after my repair, and since I extended the outlet pipe, and pointed the pipe down, the exhaust isn't hitting the bottom of my side case. The BMW left case has a small section of fiberglass mat attached to the bottom to deal with heat from the stock exhaust. Even with my repair/modification there will be a lot of heat under the case.
Note that the BMW muffler is a double wall construction, with a layer of insulation. My repair is single wall. If the cases were off, and the muffler was hot, it would be important to keep people (i.e. a passenger) away from the muffler. However, I've always got the cases on, and the front of the exhaust where it exits the cylinder heads is much hotter.
I'm surprised that BMW didn't make the outlet longer. Doing it to BMW standards would require a heat shield or double wall construction, but that's not too tricky. Also, this is a very expensive part. I'm surprised that the inner wall and pipes aren't stainless. If this muffler were 100% stainless construction, I'd never have had a problem.
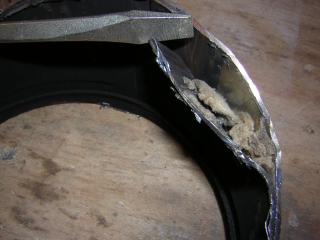
First I cut off the end cap. That didn't leave enough room because the welds on the outlet repair are inside the muffler. I had to cut off more of the muffler's outer case to be able to weld the new pipe to the old.
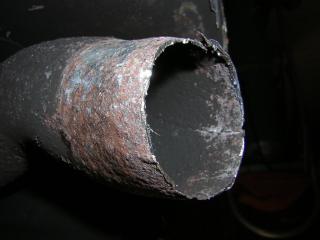
Here we see the three main parts of the inner muffler. The opening on the right (dark and hard to see) is the inlet to the muffler. The outlet pipe is the entire upper left quadrant of the photo. Below the outlet pipe is the baffle. The end of the baffle is open. You can also see a few of the many small holes in the baffle. The exhaust gas goes into the baffle pipe which connects to the front end of the outlet.
The muffler is actually a double wall. Between the walls is a very thin fiberglass (or ceramic wool) insulator. This is clever BMW engineering. This must be just enough insulation so that the muffler doesn't need a heat shield.
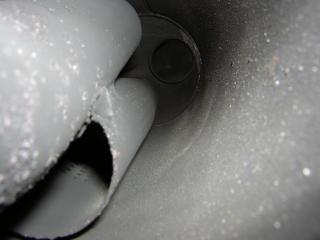
The rusted outlet pipe. I've cleaned it up a little. Welding to this was tricky. It's pretty thin, and my MIG burned through a couple of times. I had to weld the burned through holes closed. My welding skill is not great, so I had to grind down some of the uglier parts, and reweld them.
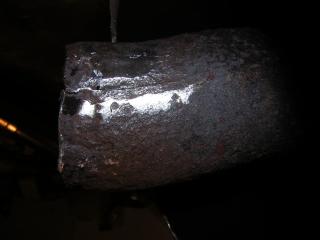
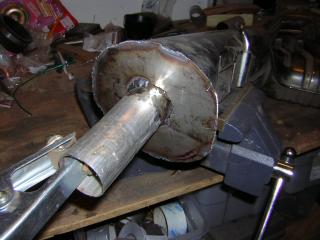
Here is the outlet trimmed even, and wire brushed to remove most of the rust where I'll weld on the new section. In this photo the muffler is upside down.
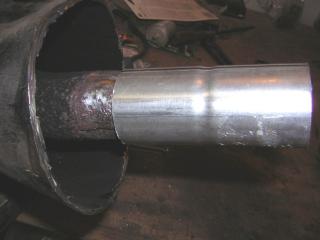
The new section is a standard exhaust adaptor from the auto parts store. Cost for the new part was about $2. The size was a tight fit to the original pipe shown here. I tapped on the new pipe, angled it down a little. After some test fitting, I welded the whole thing together. The planning, cutting, and test fitting took hours (maybe 4 or 5 hours). The welding was quick. The welding was less than an hour, and may have only been 30 minutes.
Before welding. The new pipe is fit over the outlet pipe. I've wire brushed the old outlet to get a better weld.
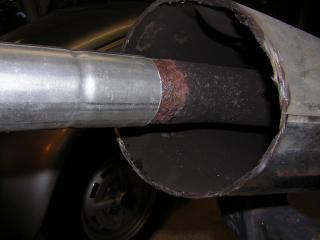
Just a view of the new pipe on the outlet. In this photo, we are looking at the bottom of the muffler. The new pipe is angled towards the camera, so we can't really see its orientation.
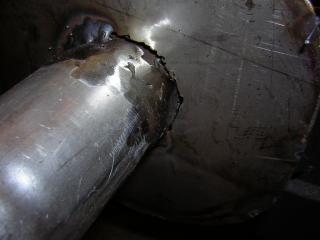
The new end plate is tack welded to the new outlet pipe extension. The end plate is a single piece of stainless steel.
Tack welds holding the new end cap to the muffler case.
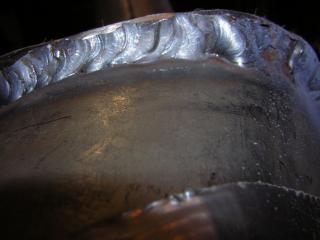
A wider view of the end cap before final welds.
Some of my welds look ok. None of my welds are as pretty as professional, factory welds.
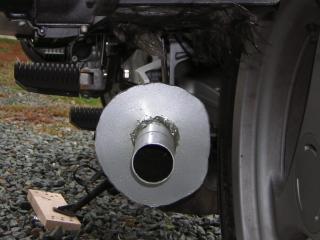
The muffler, installed on the bike. I've painted the new end cap and outlet pipe. The original outlet (that rusted) was more or less aimed upwards. I've made the new pipe longer, and aimed it down, away from the bottom of the system case (hard saddle bag).
After final welding, I cleaned up some of the more jagged sections with a grinder. I then primed and painted the entire repair area.
 This is the inside of a BMW muffler. The pipe in the center is the outlet, which has rusted through, making the motorcycle loud. There's no packing inside, just a baffle.