Changing the Golf (and probably Jetta as well) head lights is interesting. The halogen bulbs are behind two covers, and the bulb is held in place by a spring bail (instead of a bayonet twist retaining ring). The outer cover has a screw, and the bulb/assembly cover also has a spring bail.
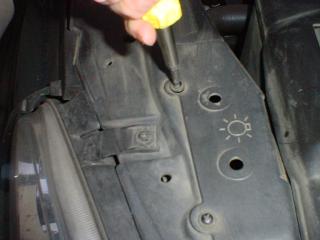
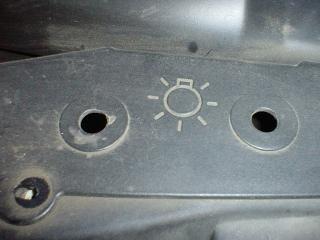
Start by removing the outer plastic cover. Locate the light bulb icon. This is under the hood (of course), above the head light.
(Legalese: This site is not associated with or endorsed by Volkswagen corporation in any way. Product names and trademarks are the properties of their owners. Tom (me) is just a guy, and not affiliated with VW in any way.)
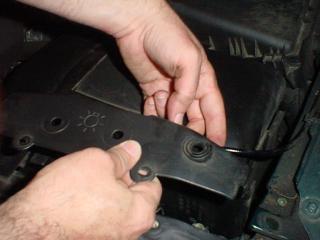
The outer cover has two screws.
Lift the outer cover off.
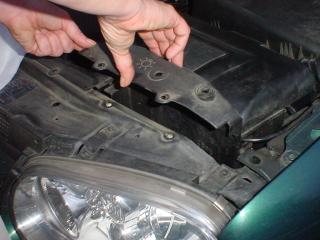
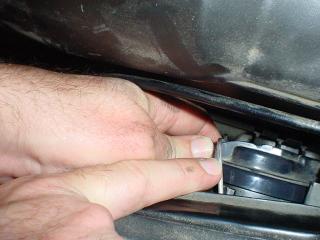
The left side is in front of the battery. This is quite difficult to reach. You can see the spring bail and light cover in the lower/center of the photo.
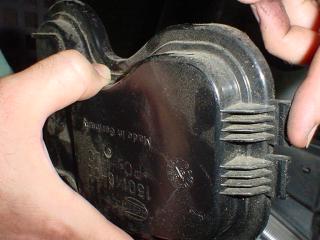
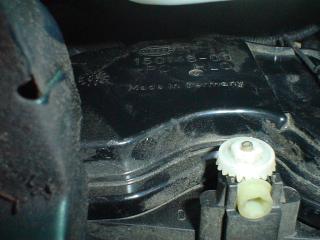
This is what the cover looks like removed.
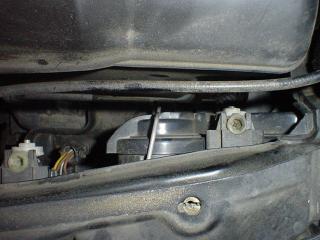
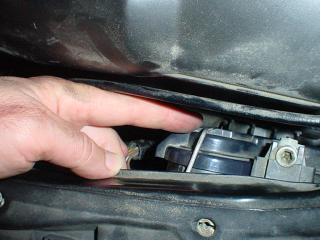
This photo is the rear of the bulb, behind the cover. I think this photo was take on the right side. The left side is hard to access, and hard to see. If you have trouble on the left, it might be easier to remove the battery.
If you remove the battery, remember, the positive is the first off and the last back on.
Another photo of the rear of the bulb.
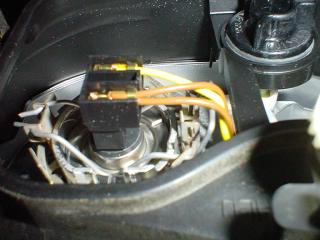
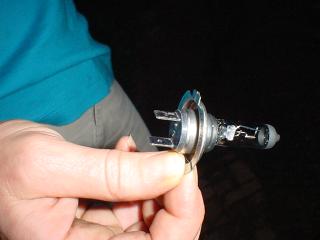
This is not a standard bayonette bulb. Instead there is a verticle wire spring bail holding the bulb. This photo is side ways, so the bail release is under the yellow and brown wires. I think the bail is pushed inwards (towards the front of the car) and you squeeze it. Tricky.
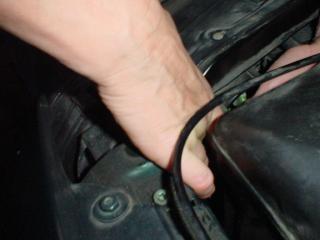
Reaching between the battery and the light. This was difficult.
Removing the bulb would have been easier with the battery out.
That's the battery in the lower part of the photo.
The rear of the bulb. The electrical connection is just a couple of tabs.
Remember not to touch the new bulb. It is pressurized quartz, and oil from your fingers can cause the bulb to burst when it is turned on.
Getting the bulb into place without touching anything is difficult. If you touch the bulb, wipe it clean with a clean cloth. Do not scratch the bulb.
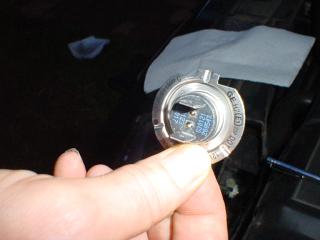
Note the alignment tab on the flange of the bulb base. The tab is facing up in this photo. Verify the tab's alignment by looking at the mount (on the car) before installing the bulb.
Another view of the bulb. The tab is facing up here.
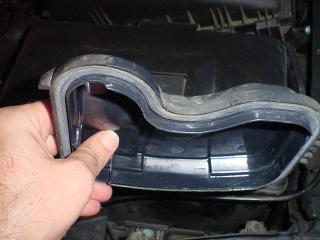
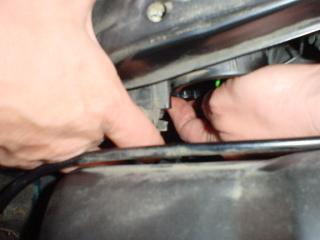
The cover has tabs on one end, and a spring bail on the other end. My left finger is on the tabs.
Reassembly is reverse of removal. Plug the bulb into the electrical connector, place the bulb in the proper mounting location, lock the bulb bail in place, put the cover back on (tabs first), and finally lock the cover spring bail in place.
This is the most complex headlight replacement I've seen on a modern car. My experience is limited, but this operation has quite a lot of steps.
Note the spring bail on the cover returned to its locking position.
This is the cover in place. The white wheel is the head light vertical alignment adjustmenter.
 Changing the Golf (and probably Jetta as well) head lights is interesting. The halogen bulbs are behind two covers, and the bulb is held in place by a spring bail (instead of a bayonet twist retaining ring). The outer cover has a screw, and the bulb/assembly cover also has a spring bail.