You don't need to do this. "Five Stars" makes Givi compatible racks for the VLX (and engine guards too). It may take a while to get them here in the US due to back orders, but you can get them, and they are worth the wait. You can order the racks from http://riderhaus.com/
I didn't know that so I spent a whole weekend cutting and welding a set of Givi racks for a BMW F650.
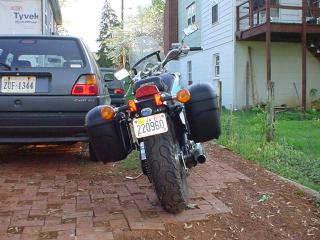
Project status: The racks have been cut, welded, painted, and are on the bike. The racks and E21 bags look great. No holes were drilled in the rear fender, and my installation is compatible with a sissy bar! Moving the rear turn signals is necessary. The mounting point for the Givi tubular rack is different in my installation from the Honda Shadow VLX sissy bar mount points.
You can mount Givi tubular racks as I show here, and keep your Honda sissybar
Scroll down to the bottom of the page for photos of my VLX with the Givi bags mounted. (click any image for a larger view).
For various reasons I decided my bike would be more practical with waterproof locking hard bags. Givi no longer offers mounts for the VLX (and LeatherLyke never has for pre-1999 VLX models, and apparently neither does JC Whitney), so I bought a Givi tubular rack for the BMW F650. This is one of the least expensive Givi racks, and I modified it to fit my VLX. It was a huge chore to figure all this out, but the cutting and welding weren't too bad.
My total time was around 10 hours, including figuring out how to modify the racks and mount them on the bike.
Materials: Givi E21 flat black Monokey cases (2) Givi tubular racks for the BMW F650 (older F650 ... I'll list the Givi part number) Scott Holloway's turn signal bracket assorted metric bolts and anti-vibration nuts (aircraft style with nylon aka Nylock) assorted medium gauge mild steel (3/32 inch thick) paint
Tools: hand tools MIG welder grinder Dremel tool drill
First move the rear turn signals.
The racks bolt to the old turn signal mounts, and to the rear frame just inside the fender. There is a gap between the fender and the rear frame, and an existing hole. I have used the passenger foot peg mounts as the front mount for the rack.
I don't think my mounting strategy would work on later model VLX's with chrome mount/accent on the side of the rear fender. Maybe it would work with some minor mods.
It looks great! Aside from moving the rear turn signals and removing the passenger foot pegs, the bike wasn't modified. I'm sure that the passenger foot pegs could be modified to remain on the bike.
I have also removed the helmet lock from the stock position, and welded a mount on the left rack, so I'll be able to use the saddle bags and the helmet lock.
Big warning: I should have made the front mounting tab longer. The stock Givi tab length is about 1/8 inch (3 mm) too short, so my rear fender had to be bent a little. You can't tell, and I don't thing it effects the fender, but I had to get my girlfriend to lift up on the fender so I could bolt on the rack.
Click any image for a larger view.
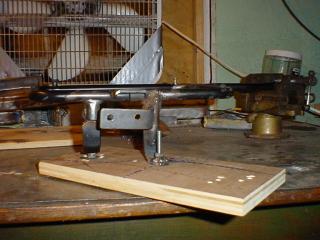
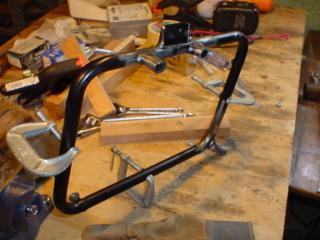
This is the finished rack bolted to the plywood jig. The jig has holes that match the holes on the motorcycle, so the mount points will be positioned correctly.
In most of these photos, the rack has been finished welding, and is reattached to the jig for informational purposes only.
The Givi rack only stays on the jig until the tack welds are complete. After tacking the mouts, try it on the motorcycle. If things are fine, finishe the welds. The weld angle are awkward, so I actually did 5 or 6 small welds.
Side view of the jig. Note that the left mount which is the rear mount on the motorcycle is offset with two nuts underneath. Sadly, I put the nuts on the wrong side, and didn't check the rack on the motorcycle after the initial tack welds. Opps. It took 30 minutes to cut off the bad weld. This image is correct.
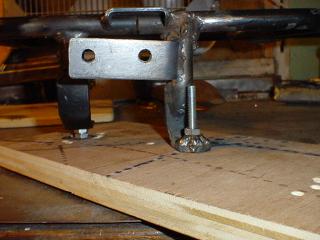
A closer image of the jig positioning. The left rack mount is the rear mount on the motorcycle which bolts where the turn signals used to mount. Note the L shaped tab welded onto the front rack mount (right side) where I'll bolt on the helmet lock.
Note the nut welded onto the front (left in photo) mount. A captive nut makes installing on the motorcycle much easier. (Givi should make this improvement to their racks)
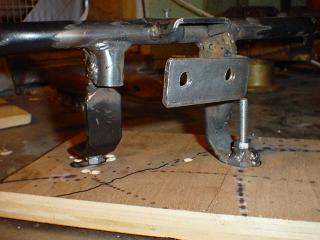
Another closeup of the jig with the Givi Monokey rack. There is a dotted guide line between the holes which is level on the motorcycle. The diagonal dotted brown spots are where weld spatter rolled across the plywood jig. Always keep a fire extinguisher handy.
Note that the rack is all finished up, including a nut welded onto the front (left in photo) mount. I put the rack back on the jig just for this photo.
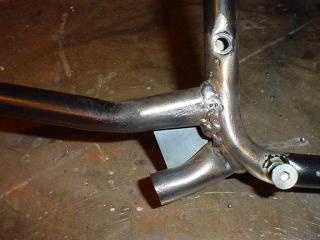
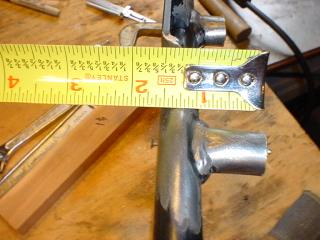
The front mount point. I cut off the original front mount leaving a couple of inches. I welded on the front mount straight in line with the rest of the rack, but dropped 1.5 inches below a straight line between the lower mount points. Note the flat gusset reinforcing the front mount.
This is the length I cut off the top mounts. Looking back, I should have just cut them off flush, welded the mounts, and probably put in a small gusset to reinforce the mount.
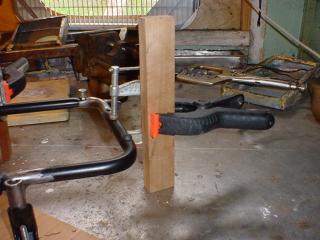
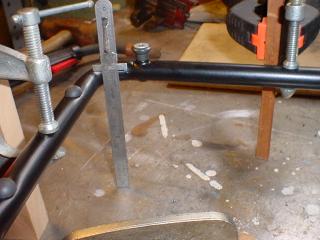
Holding the rack in positiion is tricky. I clamped small C clamps to the rack, then used spring loaded clamps to hole 3 small legs to the C clamps. Note the plywood jig in the lower left corner. The Givi rack must be completely level with the jig.
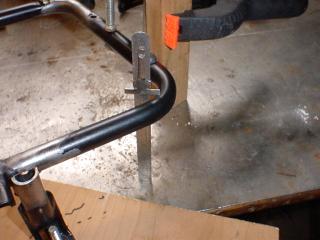
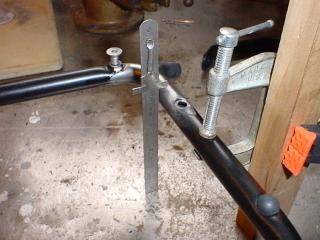
This is how I leveled up the Givi Monokey rack. The steel rule has a cross piece, and I checked that all 4 corners of the rack were the same height from my bench top.
Another view of the leveling process.
A close up of the leveling with the C clamps and the wooden leg. The C clamps do mar the finish of the Givi Monokey rack, so some sanding and painting are required at the end.
How the Givi rack looks with just the C clamps in place.
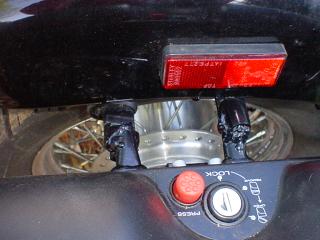
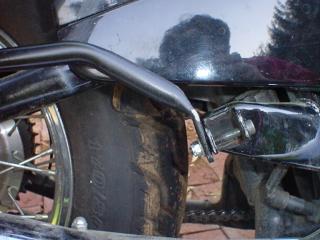
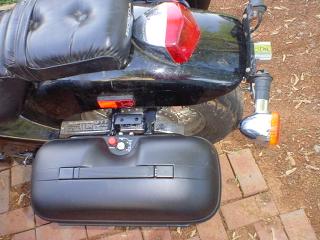
A closeup of the rack bolted the Honda Shadow VLX. The front mount goes up behind the fender (there is a gap there, and a hole in the fram already exists. The rear mount bolts to the turn signal mount.
Important: I welded a nut to the front mount. Other wise I would have gone insane trying to holding the Givi Monokey rack, the bolt, lockwasher and the nut.
A nice view of the rear mount in the old turn signal mount. You can use your imagination for the front mount. It goes between the fender and the rear frame.
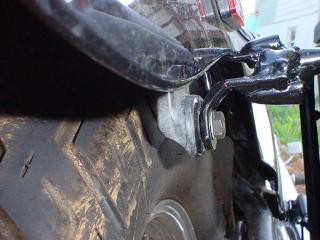
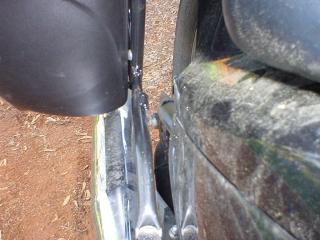
I removed my passenger footpegs since I never carry a pillion. The Give saddle back mount rack front mount is bolted to the foot peg mount with a bolt and an anti-vibration aircraft (aka Nylock) nut.
Opps. This photo cuts off the front mount. It almost shows at the bottom of the pictuer.
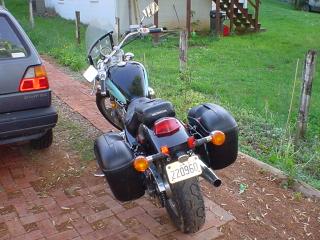
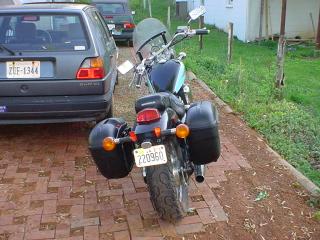
Another rear view. Note that there is at least 4 inches clearance above the exhaust pipe.
A lower view.
Top view of the left site. In this photo the helmet lock has not yet been mounted. Since then, I've mounted the helmet lock. It's great! This is a perfect position for the helmet lock. I use a mountain bike seat retainer cable ($5 from my local Performance Bike Shop) to go through my full coverage helmet, and I can use the same cable to lock my riding pants and/or riding jacket. Yes, the pants and jacket fit into the Givi E21 Monokey saddle bags, but then I can't haul other crap.
 You don't need to do this. "Five Stars" makes Givi compatible racks for the VLX (and engine guards too). It may take a while to get them here in the US due to back orders, but you can get them, and they are worth the wait. You can order the racks from http://riderhaus.com/